
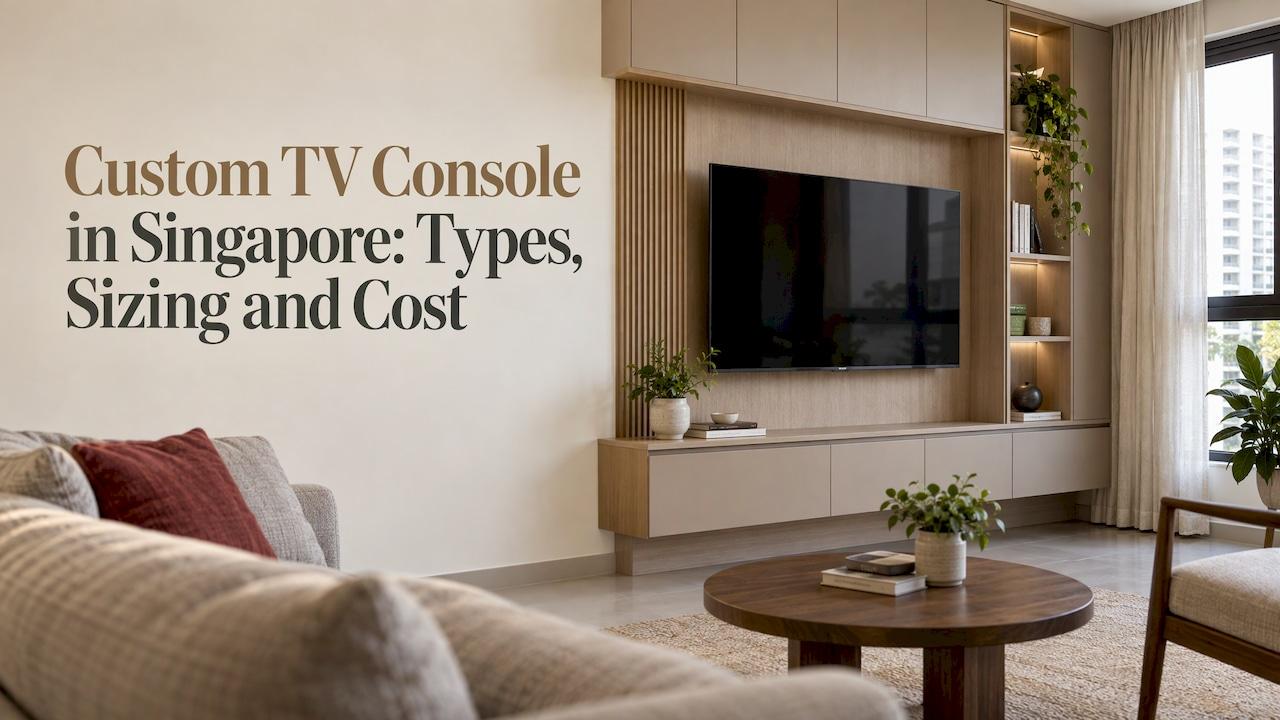
A custom TV console is worth it when it is designed together with the wall, the lighting and the electrical points around it, and built by the same team that plans them. For most Singapore homes, that means choosing between a floating console, a floor-standing unit and a full-wall built-in, then fixing the TV position, the device list and the budget before the carpenter starts. At One Home Interiors, our design-and-build service puts design and construction under one team, so the console you approved in the 3D drawing is the one that gets installed.
TL;DR
- Choose the type by room size and storage need: floating for light, open looks; floor-standing for flexible storage; full-wall built-in for a fitted entertainment wall.
- Fix the TV size and viewing position first. Console height, depth and seating all follow from that.
- List every device, cable and power point before design starts. The count is almost always higher than expected.
- Budget by the foot run or square foot. Our published rates are S$170 per ft run for a low-height TV console and S$50 per sq ft for a feature wall.
- Keep the carpentry, electrical and wall finishing in one coordinated plan so nothing clashes on site.
Table of Contents
- What a custom TV console actually is
- The three main types, and who each suits
- Start with the television, not the cabinet
- Plan storage around the things you own
- HDB flat, condo or landed: what changes
- What a custom TV console costs in Singapore
- Why one team matters for a TV wall
- How we build a custom TV console with you
- Ready to plan your TV wall?
- A short checklist before you commit
- FAQ
What a custom TV console actually is
A ready-made TV stand is bought in a fixed size and placed against the wall. A custom TV console is made to the dimensions of your wall, your television and the equipment you own. It is usually carpentry: panels, drawers and doors made and fitted to your measurements, finished in laminate, veneer or paint to match the rest of the home.
The advantage in a Singapore flat or condo is fit. Living room walls are often awkward: a beam above, a column to one side, a window or a door that eats into the usable width. A made-to-measure console can be cut around these, hide the awkward gap and use every centimetre. Readers also search for this as a built-in TV console or a custom TV cabinet design. They mean the same thing: a unit made for one specific wall.
The three main types, and who each suits
Floating (wall-mounted) console
The console is fixed to the wall and sits above the floor. The floor stays visible beneath it, which makes a small living room feel wider and makes sweeping and robot-vacuum cleaning easy. Storage is usually limited to a few drawers or a single long cabinet, and the unit is harder to move later because it is anchored into the wall.
This suits a compact BTO or resale flat, a couple who want a clean look and own few devices, or anyone who dislikes dust gathering under furniture.
Floor-standing console
This is the traditional shape: a low cabinet resting on the floor with doors, drawers and open shelves. It holds the most for its footprint, and because it is not fixed to the wall you can rearrange the room later. The trade-off is the gap under and behind it where dust collects, which a plinth or a closed base can solve.
This suits families with many devices, game consoles, board games, children's items and remote controls that need a home.
Full-wall built-in (feature wall)
The console, the display shelves, the tall storage and the panel behind the TV are designed as one piece, floor to ceiling or wall to wall. It becomes the focal point of the living room and can conceal wiring, a router and speakers behind panels. It takes more planning, and it is a fixed installation, so decisions about size and layout should be settled before work begins.
This suits newlyweds creating a first shared living space, families who want one wall to carry storage and display, and anyone wanting the room to look intentionally designed rather than furnished piece by piece.
| Floating | Floor-standing | Full-wall built-in | |
|---|---|---|---|
| Look | Light, open | Classic, grounded | Fitted, architectural |
| Storage | Limited | Good | Highest |
| Cleaning | Easiest | Needs a plinth or care | Minimal gaps |
| Flexibility later | Low | High | Low |
| Planning needed | Moderate | Low to moderate | Most |
Start with the television, not the cabinet
The most common planning mistake is designing a handsome cabinet first and fitting the television to it afterwards. Reverse the order.
- Decide the screen size from the seating distance. Measure from where you sit to the wall. The further you sit, the larger the screen you can use comfortably. If your sofa is fixed, for example against the opposite wall or a window, that distance is your starting point.
- Set the screen height for seated viewing. The middle of the screen should sit roughly at eye level when you are seated on the sofa. A screen mounted too high, a habit carried over from bedrooms and shops, strains the neck over a long evening.
- Work out the console height from that. A lower console lets the screen sit at a comfortable height without a very tall panel behind it. A very tall console pushes the screen up.
- Allow the console to be wider than the TV. A console that is only as wide as the screen looks cramped. Leave a margin on either side so the TV looks anchored, and allow for speakers or a soundbar if you have them.
- Check the walkway. Leave a clear path in front of the unit, especially in a small room where a door swing or a dining table is nearby.
Two more details save trouble. First, a large screen needs a solid fixing point on the wall, and the bracket position does not always line up with the top of the cabinet, so settle the bracket fixing as its own item rather than assuming the cabinet will carry it. Second, if the living room wall faces the afternoon sun, plan the blinds or curtains in the same drawing. Glare on the screen is a design problem, not just a lighting one, and it is far easier to deal with before the wall is finished.
If you would rather not do these measurements from scratch, this is where a studio earns its fee. Our interior design and space planning work starts from how you sit, watch and live in the room, and our 3D visualisation lets you see the console on the wall before anything is cut.
Plan storage around the things you own
A console that looks excellent but cannot hold your equipment will be cluttered within a month. Brief the design around real objects:
- A soundbar or AV receiver, which needs depth and space to breathe
- Game consoles, streaming boxes and a Blu-ray player
- The Wi-Fi router, if you want it hidden but still working
- Remote controls, controllers, chargers and cables
- Games, discs, photo frames and books you want on display
- Anything that belongs to the children and tends to end up on the living room floor
Write this list down and give it to your designer. Then count every item that needs a plug. The number is almost always higher than first thought, and a missing socket means a trailing wire across the finished wall.
Cable management
Decide early which cables run inside the wall and which run inside the cabinet. In-wall conduits for HDMI and power are far neater than cables behind a panel, but they must be installed before the carpentry goes up. The sequence matters: electrical points first, then the carpentry, then the final paint and touch-ups. When one team coordinates all three, the points land where the cabinet needs them. When separate contractors do each trade, gaps and misalignments are the usual result, and that is the exact problem a design-and-build approach is meant to prevent.

Ventilation and heat
Amplifiers, consoles and set-top boxes generate heat. Closed doors in a warm, humid room can trap it. Use ventilation slots, perforated panels or louvred doors for the compartments holding powered equipment, and leave breathing space around them. Ask for these details to be shown in the drawing, not left for the carpenter to decide on site.
Materials for a humid climate
Singapore's warm and humid conditions are hard on carpentry. Panels and edges should be chosen and finished with that in mind, and the material schedule should be written down in the quotation so you know what is behind the surface as well as on it. Our design approach is built around layouts and materials suited to Singapore homes and climate.
Lighting and the feature wall
A built-in unit is a good place for concealed lighting: a soft strip under a floating console, a warm glow behind a panel, or small spotlights on display shelves. Lighting circuits need to be planned with the electrical points, so decide it before the wall is closed. For the panel behind the TV, a feature wall can be finished in a material that adds texture to a plain living room, as long as the TV bracket position and any lighting are marked on the drawing first.
HDB flat, condo or landed: what changes
The type of home affects what you can build, not just what looks good.
- HDB flats generally have smaller living rooms, so floating and low consoles keep the room open. Feature walls work well when the room is narrow and you want to add storage without adding furniture. Renovation in an HDB flat follows HDB's rules, and the structural and electrical works they cover must be done by the people the rules require. Your designer should plan around these from the start.
- Condominiums often have more open-plan living areas, where a full-wall built-in can act as a divider between living and dining or study areas.
- Landed homes and bungalows have space for generous wall-to-wall units and for hidden media rooms. You can see how we handle larger homes in our Coronation Road Bungalow and Sentosa Cove Villa projects.
For flat-sized examples, look at the Bishan family flat, the Toa Payoh family flat and the Sengkang family HDB projects.
What a custom TV console costs in Singapore
Carpentry in Singapore is usually priced by the foot run (the length of the unit along the wall) or by the square foot for panels and platforms. Four things move the final figure:
- Length and height. A longer or taller unit uses more material and labour.
- Type. A low floor-standing console is simpler than a floating unit with hidden fixings, which is simpler than a full wall with tall cabinets.
- Finish and materials. Laminate, veneer, spray paint, glass and stone each price differently, as does the hardware inside.
- Extras. Concealed lighting, in-wall conduits, extra power points, glass doors, a feature wall behind the TV and display shelving all add to the quotation.
Our published rates, as listed on our pricing page, give a clear starting point:
| Item | Published rate |
|---|---|
| TV console (low height) | S$170 per ft run |
| Feature wall | S$50 per sq ft |
| Storage / display / book cabinet (casement door) | S$310 per ft run |
| Platform (flush, no storage) | S$35 per sq ft |
A worked example
Take a 3-room flat with a living room wall about 8 ft wide. You want a 6 ft low TV console and a feature wall behind it that is 8 ft wide and 8 ft high.
- TV console: 6 ft × S$170 = S$1,020
- Feature wall: 8 ft × 8 ft = 64 sq ft × S$50 = S$3,200
- Total at the published rates: S$4,220
If you add a tall casement-door display cabinet of 2 ft run beside the TV, that is another 2 × S$310 = S$620, bringing the combined figure to S$4,840. Electrical points, lighting and any special finishes are quoted for your own project, so use these numbers as a first estimate rather than a final price. For a precise figure, send us your wall dimensions and wish list, and we prepare an itemised quotation.
An itemised quotation is the most useful document in this process, because it shows what each part costs and lets you adjust the design to meet your budget. For instance, you can shorten the feature wall, change the finish or move from a full wall to a console with a simple painted wall behind.

Why one team matters for a TV wall
A TV wall touches four trades: carpentry, electrical, painting and sometimes ceiling or lighting work. Each depends on the others. If the electrician places a socket where the cabinet back panel should be, or the painter finishes the wall before the feature panel is fixed, you pay for rework or live with the compromise.
This is the problem our design-and-build model addresses. Design and construction are coordinated by one team from concept through handover, and you receive project updates throughout. The console you see in the drawing is built by the people who drew it, with the electrical points planned to match. For a TV wall that is the difference between a unit that looks seamless and one with visible workarounds.
How we build a custom TV console with you
The process below is how a typical TV console project runs under a design-and-build contract.
- Brief and site measurement. We note the wall dimensions, any beams or columns, the TV size you want and the equipment you own.
- Layout and 3D visualisation. We show the console in the room so you can judge proportions, height and finish before committing. See our 3D visualisation and design services.
- Itemised quotation. Each element is listed and priced so you can compare options.
- Coordinated works. Carpentry, electrical points and finishing are scheduled by one team, so the sequence is right.
- Styling and handover. The finished unit is styled and handed over. Our styling and handover service covers the final touches.
Ready to plan your TV wall?
If you are renovating a whole home, the TV console works best as one part of a single plan, with the living room, kitchen cabinets and wardrobes designed together. Our design-and-build package covers design, carpentry, renovation works and project management under one roof, and our Services page lists each one.

If you only need the TV wall, you can still start with a conversation. Contact us with your wall measurements, and we will talk through the options and give you an itemised estimate.
A short checklist before you commit
- Do I know the TV size and where the sofa will sit?
- Is the screen centre set for seated eye level?
- Does my device list include every cable and every plug?
- Are ventilation slots shown for powered equipment?
- Are the electrical points and lighting on the same drawing as the carpentry?
- Does the quotation list materials, finishes and hardware by item?
- Is the bracket fixing planned separately from the cabinet top?
- Have I allowed for glare from windows facing the sun?
If you can answer yes to each, your console will be easier to build and far more pleasant to use.
FAQ
What is the difference between a custom TV console and a built-in TV console?
The two terms overlap. A custom TV console is any unit made to your measurements, whether it stands on the floor or floats. A built-in console is fixed to the wall or integrated with a feature wall and storage, so it is part of the room rather than a piece of furniture. A built-in is always custom, but a custom console need not be built in.
How wide should a custom TV console be?
It should be wider than the TV, with a margin on each side so the screen looks anchored, and it should fit your wall without crowding doors or walkways. In a small flat, a console covering most of the focal wall works well. Your designer can show the proportions in a 3D view before anything is made.
How much does a custom TV cabinet cost in Singapore?
It depends on length, type, finish and extras such as lighting and electrical points. Our published rates are S$170 per ft run for a low-height TV console and S$50 per sq ft for a feature wall, so a 6 ft console with an 8 ft by 8 ft feature wall comes to S$4,220 at those rates. We confirm the final figure in an itemised quotation for your home.
Is a floating or floor-standing console better for a small HDB living room?
A floating console keeps the floor visible and makes cleaning easier, which helps a small room feel larger. A floor-standing console gives more storage and is better when you have many devices and household items to hide. Many small flats combine a floating unit with a tall cabinet to one side.
Can the TV console be designed together with the rest of my renovation?
Yes. Planning it with the living room layout, lighting and electrical points gives the neatest result, and our design-and-build team coordinates these under one project. You can also add kitchen cabinets, wardrobes and other carpentry in the same quotation.